Sample Life of an Evaluation Task
The following illustrates a "day in the life" of an evaluation task, including each step it goes through within the Evaluation Tracker workflow.
In this article:
Create the Evaluation Task
The first step in creating an evaluation task is finding the course that needs review.
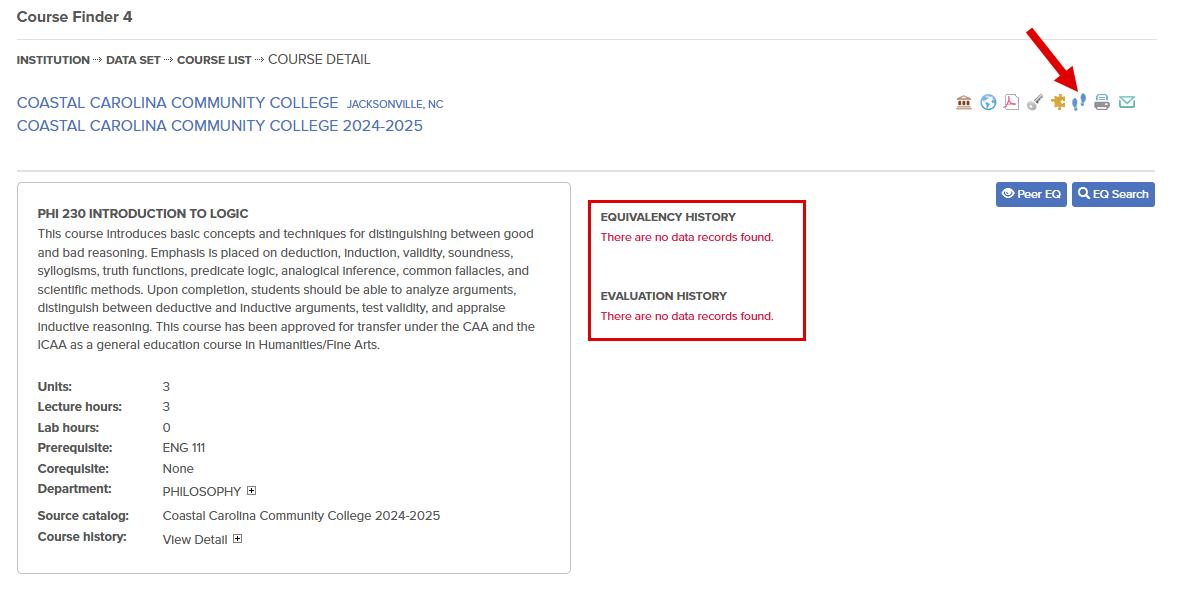
In the example below, a transfer student took PHI 230 Introduction to Logic from Coastal Carolina Community College in Fall 2024. Using this documentation as a resource, within the Course Finder, a user would:
- Search for the institution name.
- Select the data set containing the course.
- Or use the Course Code or Course Title search to search across all data sets.
- Select the course from the data set.
- Review the EQUIVALENCY HISTORY and EVALUATION HISTORY before initiating the review.
- The EQUIVALENCY HISTORY below shows that this course does not have an equivalency in TES.
- The EVALUATION HISTORY shows it has never been evaluated through the Evaluation Tracker workflow.
- Select the footprint icon ("Create evaluation for all courses below") to send the course for review.
See the hyperlinked articles for further information about using Peer Equivalencies and the EQ Search as resources when creating evaluation tasks.
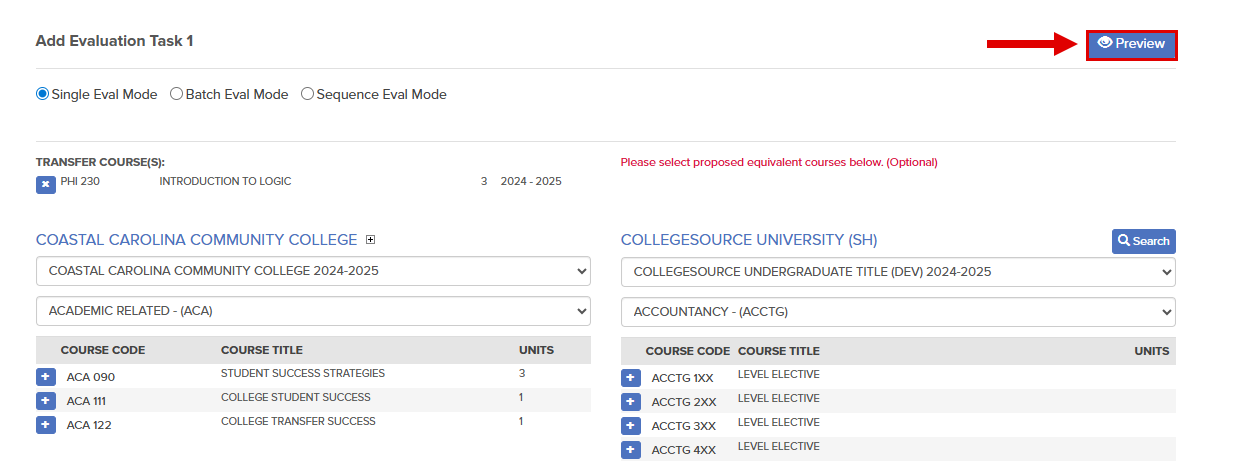
- Select Preview.
- In this example, the evaluation task is being created without a proposed equivalency.
- Assign the task to the Philosophy evaluator, René Descartes.
- Ensure the Send email alert? checkbox is marked so that the evaluator receives a notification.
- While no support files were uploaded, up to two files (less than 10MB each for a total of 20MB) can be attached when creating the task. Additional files can be attached through the My Evaluations and All Open Evaluations queues.
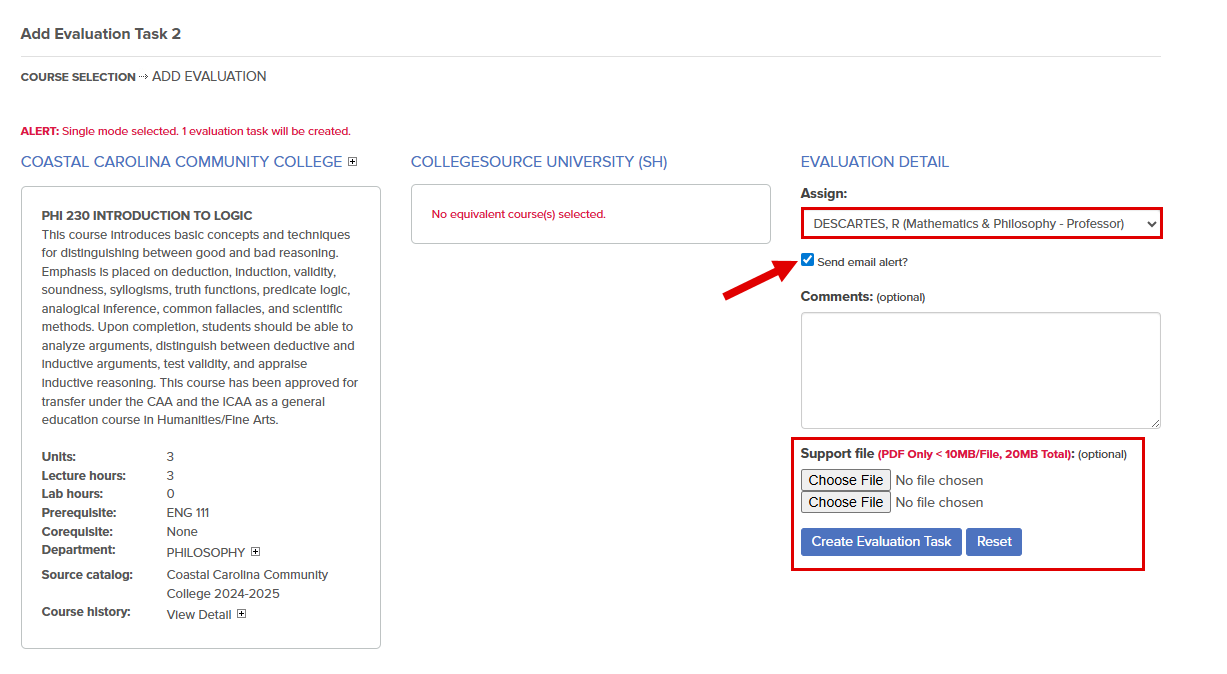
- Select Create Evaluation Task.
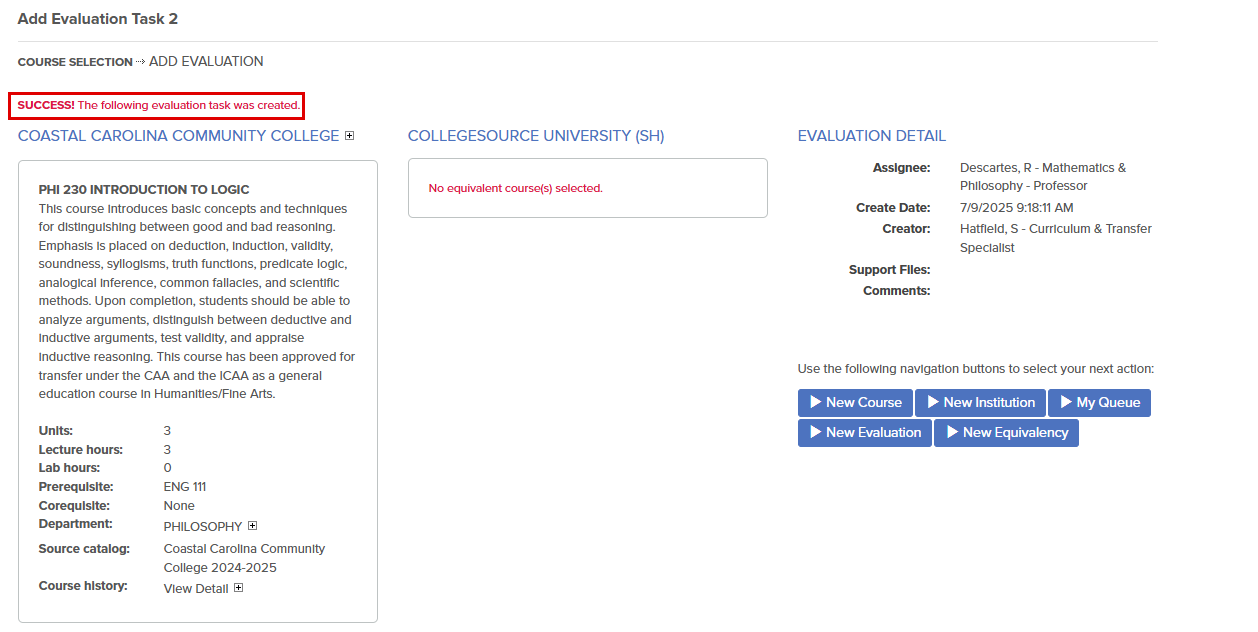
A confirmation will appear on the screen indicating that the evaluation task was created.
Review the Evaluation Task
Since the Send email alert? checkbox was marked, the evaluator will receive a notification that the task needs review:

To review the task, the faculty member would:
- Log in to TES®.
In this example, the evaluator is taken directly to the user's My Evaluations queue because the user set this as the default home. For setup, see User Preferences: Change Password and Set Home Page ("A Specialized Case: The Faculty Evaluator").
- Select the arrow ("Select an institution") to the left of the institution name.
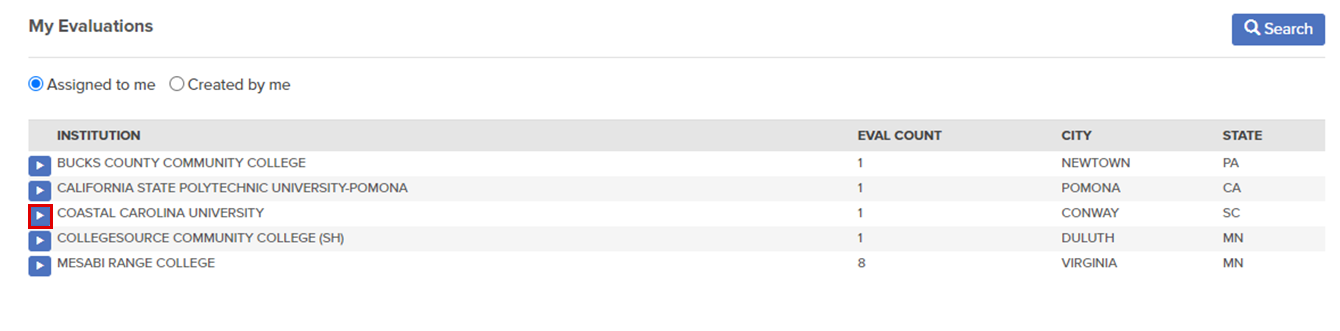
- Select the Edit evaluation arrow to the left of the SEND COURSE(S) to open the evaluation task.

- Review the details of the evaluation task.
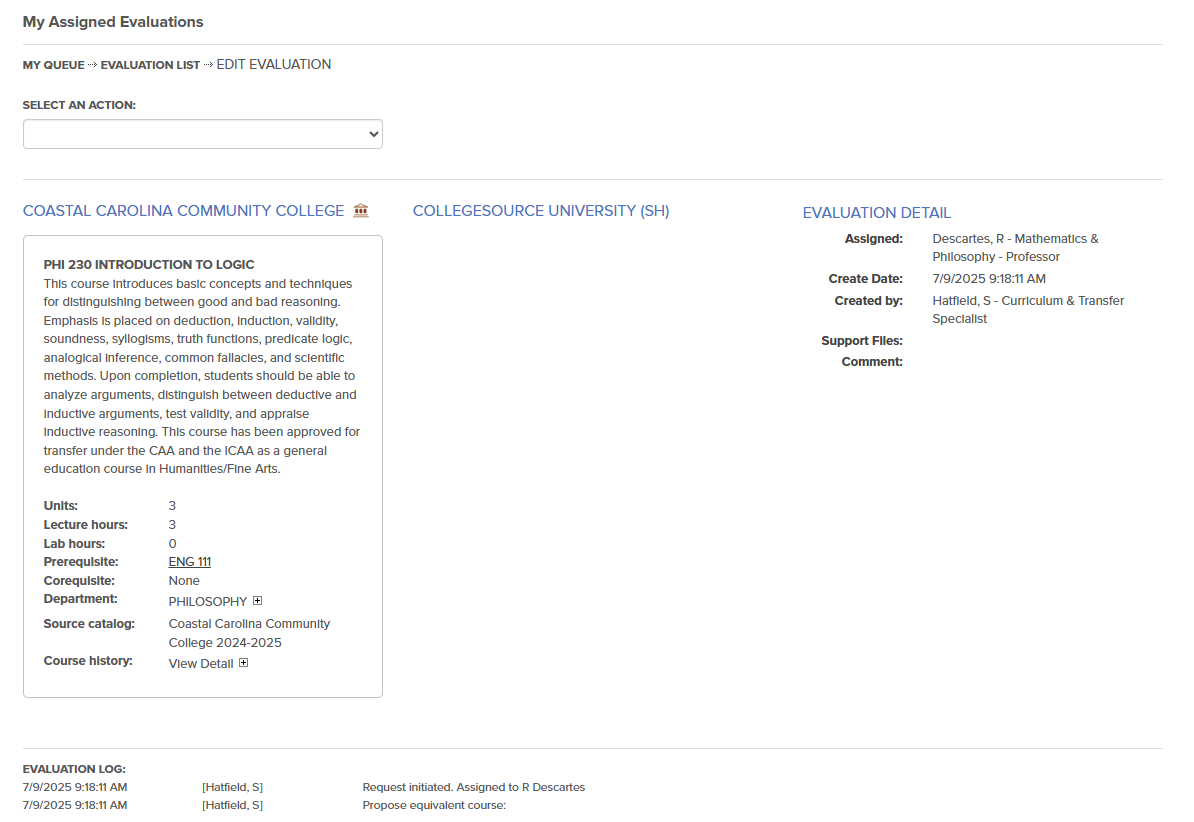
For further details about the information available within an evaluation task, see My Evaluations: Tasks Assigned to Me under Related Articles.
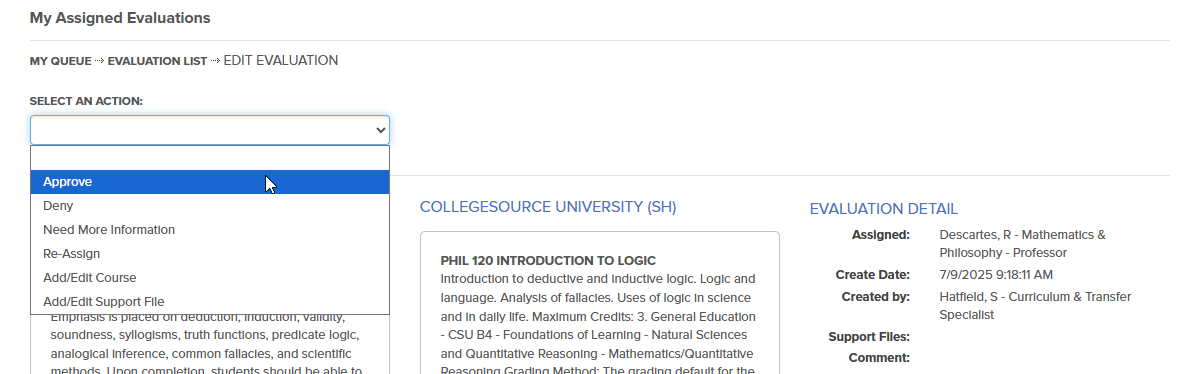
- Within the SELECT AN ACTION drop-down, select Add/Edit Course.

- Select PHILOSOPHY - (PHIL) from the Department drop-down.
Because the TES Administrator at CollegeSource University established Philosophy (PHIL) as one of Professor Descartes' Priority Departments, this Department can quickly be selected from the list. If it were the evaluator's only Priority Department, it would be automatically selected.
- Select the equivalent course(s).

Professor Descartes has the SERVICE EVAL user right and can add or remove equivalent courses. The MANAGE EVAL user right is required to add or remove transfer courses.
- Select Done.
- Within the evaluation task, within the SELECT AN ACTION drop-down, select Approve.
- Select the person the evaluation task needs to be routed back to from the Assign drop-down.
- If needed, notes can be entered into as well.

To appear on the list of eligible recipients, users must have SERVICE EVAL and (MANAGE EVAL or CREATE EQ) user rights.
- If the evaluation task creator has these rights, this individual will appear as the first name on the list.
- If an institution has established a default assignee for externally generated tasks, this person's name will also be a choice - in this example, they would appear as the second name on the list.
- Confirm that the Send Email? alert checkbox is marked.
- This ensures that the assignee receives notification of the evaluation task.
- Select Confirm.
The evaluation task will now disappear from Professor Descartes’ queue.
Create an Equivalency
Since the Send Email? checkbox was marked, the assignee will receive a notification that the task has been approved.

Assuming that no other approvals are needed, and that the institution stores equivalencies in TES, the next and final step will be to create an equivalency from the evaluation task.
To do this, the assignee would:
- Log in to TES®.
- Go to the Track menu.
- Select My Evaluations.
- Select the institution name from the list.
- Select Edit evaluation button to the left of the SEND COURSE(S).

- Within the SELECT AN ACTION drop-down, choose Create Equivalency and Close.

User Rights and Permissions determine what actions a user can both see and select.
The person creating the equivalency must have both SERVICE EVAL and CREATE EQ user rights to create equivalencies from evaluations assigned to them.
- Enter or select the following optional information:

|
Begin Date: The first day on which the equivalency is effective. Format: (MM/DD/YYYY) If no Begin Date is entered, but this field is selected, the equivalency is considered effective from the “beginning of time” (or at least since the course was created). |
|
End Date: The last day on which the equivalency is effective. Format: (MM/DD/YYYY) If no End Date is entered but this field is selected, the equivalency is considered effective in the future. |
|
Public View Hide? Checked Hides the equivalency from the TES® Public View and Transferology®. Unchecked The equivalency will be displayed in the TES® Public View and Transferology®. |
|
Public Note: (optional) Note to display to students in the TES® Public View or Transferology®. Maximum length: 1,024 characters. |
|
Private Note: (optional) Notes to document the evaluation process or the rationale behind the evaluation. Maximum length: 2,048 characters. Users with the CREATE EQ user right can view Private Notes when reviewing equivalencies in the Equivalency Manager. Users with the ACCESS EQ or CREATE EQ user right can view this information in the Equivalency Finder. |
|
Close Note: (optional) Additional notes to document something that happened during the evaluation process that does not need to be a part of the equivalency log. This note only appears within the All Closed Evaluations queue. Maximum length: 1,024 characters. |
|
|
If, within the Evaluation Tracker settings, an email is identified for notification when evaluation tasks result in an equivalency, that user will receive an email confirming the equivalency.
The EVALUATION LOG tracks all of the activity that takes place during the course of the evaluation, from the initiation of the request to the final resolution. This history is available to review in the All Closed Evaluations queue and in the equivalencies for the task. Users who have ACCESS EQ or CREATE EQ user rights will also be able to view this information in Equivalency Finder.
